Tutorials:Taking Totally Bitchin Pics
Contents
|
Taking Totally Bitchin' Pics
This long and verbose tutorial will give you tons of info on making your pics for your creations and contests much better. This tutorial is mostly focused on sims and taking pics of them and their content, but the tips here will be useful for many applications.
Introduction
Okay, so, your pics suck. No, they do, really, just admit it. It's okay. Admitting it is the first step. Breathe deep and just let it out. There, there, it's all right. We'll get you fixed up.
The game's engine is capable of taking some awesome pics, but you really have to know what you're doing in order to make use of it.
You Will Need
- The Sims 2, duh.
- A decent enough graphics card that you can turn up Sim/Object Detail, Lighting, and Texture Detail to High. You do not need smooth edges, reflections, or any other fancy doodadery. I don't even have a graphics card, let alone a good one, just some patience with slow framerates.
- A graphics editing program. The better the program the more you will likely be able to do with filters, etc. to improve your pics. I recommend Photoshop - though the current versions are several hundred dollars, you can purchase a used copy of Photoshop 7 for around $40 on eBay and get most of the same functions. You can also use Paint Shop Pro, Corel Photo Paint, Paint.NET, and GIMP, the last two of which are free. You can likely use most any other program that is capable of a few filters like Brightness/Contrast and Levels, some blurs, and multiple layers.
This tutorial will be written showing techniques from Photoshop, specifically Photoshop CS2. If you have earlier versions of Photoshop, or if you are using a different program, you may not be able to do everything here, or you may not be able to do things exactly as they are stated here with the same tools - most programs will offer alternate methods to do just about anything, but it's up to you to know your graphics editing program and know it well. This is NOT a tutorial for people who have just stopped playing in Microsoft Paint, so if you're unclear on your program, go Google "beginner (program name) tutorial".
Get Hacks
There are two important modifications you need to make to your game before you continue, if you want to take truly awesome pictures.
- GunMod's Camera Hack will give you MUCH better control of the camera in Cameraman mode, and allow angles and shots you could never achieve with the limits on the default camera.
- Radiance Lighting 2.2 will change the way the game's lighting works, to make for much more realistic, dramatic lighting effects. You can probably use Radiance Lighting even if you have a crappy graphics card. You will likely have to fundamentally change the way you use lighting once you install it, though, and you'll often find yourself using more lights to get things well lit. For more on using lights under Radiance Lighting, see the information in the tutorial on lighting your scene.
Those above two are pretty much essential, but if you're taking pictures of sims and you want some really great poses, you're going to need some hacks or hacked objects that allow you to put your sim in a variety of poses on demand. For that, you'll want to see the list at Content List: Hacks and Hacked Objects: Pictures, Movies, Stories, and Poses. Specific items listed there and ways to utilize them will be gone over in the rest of the tutorial.
Windowed Mode
In order to take your pictures using the methods described here, you will need your game running in a window, so you can easily switch to other applications without causing major instability and lag. Instructions on setting up Windowed Mode may be found here.
Make Your Sim
Sims look best on a lot, so we're going to create a sim and put it on a blank lot to take pics. This will make an extra character file just to take pics, so if you have a big, overcrowded Legacy neighborhood, you might want to create a blank neighborhood for pics and testing to keep this out of your main 'hood.
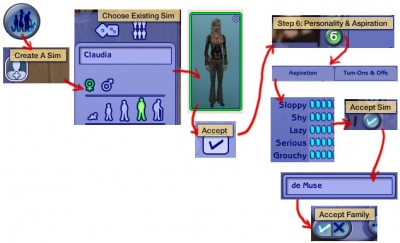
Otherwise, go into Create a Family/Create a Sim and to in to create a sim. Enter a first name, and make sure you have it set to the right age and gender. Then click on the Choose Existing Sim button. Find your sim in the sim bin and click Accept. Jump to 6, where you set your sim's personality and aspiration. Choose an aspiration for your sim, and set their personality points. To avoid slouchy, gross sims, make sure they have at least 3 points in Sloppy and Lazy. Setting it to Aquarius gives you a basic personality. If you have Nightlife give your sim some Turn-Ons and a Turn-Off. Then choose Accept Sim. At the family screen, type a family name, and then click Accept Family.
Create a Set
Now you'll be back in your neighborhood. It's time to create an empty lot that you can use as a picture-taking set for your sim.
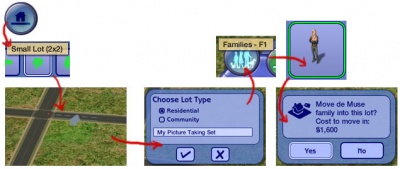
Click on the Lots and Housing button, then choose an empty lot. 2x2 is a good size. Place the lot in a blank spot in your neighborhood, and give it a name. It should be a Residential lot. Click on the Families button and find the sim you just made in the sim bin. Click on the empty lot you just created and move them into it.
Game Options
Graphics Settings
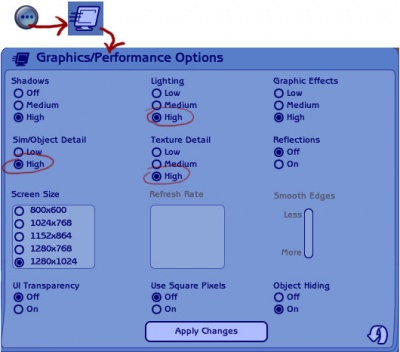
When you have gotten the lot fully loaded, you will want to first make sure your graphics options are turned up. Click on Options - Graphics/Performance Options.You will need Lighting, Sim/Object Detail, and Texture Detail at least turned up to High. Shadows can also help your pictures look more realistic, depending on how nice a graphics card you have. When you have turned your settings up, click Apply Changes.
It may take several minutes for the game to begin responding again. You will get a dialogue asking if you want to save your changes with a countdown of 15 seconds. Click yes within those 15 seconds to keep your new settings - if you miss seeing that window, your options will revert to their previous levels, and it may seem like nothing happened.
Free Will
Now we need to make sure our sim is not going to go running off to read the paper while we're trying to take pictures. Click on Options - Game Options and turn OFF Free Will.
Camera Controls
Take some time to just play around with the camera, especially if you have just installed the camera hack. It can take a while to get used to the camera controls, and even once you are experienced in their use, it may be challenging to get the shot you want with the constraints on the controls.
If you haven't taken many sim pictures before, here is a list of camera controls:
- TAB
Puts the game into Cameraman mode, allowing better and more control of the camera. Make sure you are in live mode before going into Cameraman mode or you will see grid lines on the ground and floating where floor tiles may be placed.
- W and S
W moves the camera forward. S moves it backward.
- A and D
A moves the camera left. D moves it right.
- Q and E
Q lowers the camera. E raises it.
- + and -
Zooms in and out. The further you are zoomed in, the smaller the increment you will move when using the WASD keys if you have the camera hack as advised above.
Cheats
Remember, our focus here is not on playing the game by all the rules, but taking the absolute best pictures we can, so cheat like mad! Here are some cheats that you should definitely be familiar with, and how they may be of use to you for picture taking:
- moveObjects on - This will allow you to place more than one object on a tile, and pick up and move items that you cannot normally manipulate. Most importantly, this will allow you to pick up and move your sim by hand just as you would any object, rather than having to wait for them to walk somewhere, assuming there is even a complete route to where you want them. Please note that if you have this cheat set to on, windows and doors will not snap onto walls, especially diagonals - you will need to set it back to off for easy placement of doors and windows.
- boolProp snapObjectsToGrid [true/false] - With this cheat set to false, you'll be able to place objects exactly as you want them, without them snapping to the gridlines. This will allow much better placement of sims as well as objects, and can make for a much more natural, haphazard look to the placement of objects in your pictures. Please note that if you have this cheat set to false, your windows and doors will no longer place properly - you will need to set it back to true for them to snap into place.
- boolProp allow45DegreeAngleOfRotation [true/false] - Instead of just having the four cardinal directions to rotate sims and objects, with this cheat set to true, you'll be able to rotate objects in 45 degree increments, allowing you to place objects and sims diagonally. This is helpful for exact positioning of a sim facing the direction you want them, and again, will make for more natural looks to scenes. You will need to use the < and > (, and .) keys on your keyboard to rotate the objects - clicking and dragging will not work. You will need at least one expansion to use this cheat normally. However, because the coding for this cheat was actually included in the base game, you can use this hacked bamboo plant by wintermuteai1 at MTS2 to accomplish the same thing in the base game.
- plumbbobToggle [on/off] - Set to off to turn off the plumbbob (floating diamond) that denotes your active sim. You will need Open for Business or later expansions to use this cheat. If you do not have Open for Business or later expansions, you can use the No Balloons Patch by Inge Jones at SimLogical to remove the plumbbob, or make sure you crop it out of your photos.
- showHeadlines [on/off] - Set to off to turn off thought bubbles, speech bubbles, and relationship gain/loss (++/-- graphics) over sims' heads. Making sure these graphics and the plumbbob are off (or cropped out of your pics) will make for a much more realistic look. You will need the Nightlife expansion or later for this cheat to work. If you do not have Nightlife or later expansions, you can use the No Balloons Patch by Inge Jones at SimLogical to remove these graphics.
- slowMotion [0-8] - Allows you to slow down the game's speed. Acceptable values are 0-8, 0 being normal game speed, and 8 being the slowest. Generally slowMotion 4 is about the right speed to use for picture taking, as it allows you to pause on exactly the right facial expression and pose for the perfect picture.
- maxMotives - Maxes all the needs and motives (hunger, bladder, etc.) of every sim on the lot. Very useful for keeping sims from wetting themselves while you're trying to get them to pose. You will need Nightlife or later expansions to use this cheat.
- motiveDecay [on/off] - Set to off to stop the slow reduction of sim needs and motives over time. Helpful in combination with maxMotives for long picture-taking sessions. You will need Nightlife or later expansions to use this cheat.
- aspirationLevel [0-5] - Set the sim's aspiration to the selected level. 0 is aspiration failure, 5 is platinum. Useful to keep your sims from going nuts and having a visit from the psychiatrist while you're trying to take pics. You will need Nightlife or later expansions to use this cheat.
- lockAspiration [on/off] - Set to on to keep a sim's aspiration from slowly lowering over time. Use in combination with aspirationLevel 5 to keep your sims happy and sane for long picture-taking sessions. You will need Nightlife or later expansions to use this cheat.
- setHour [0-23] - Allows you to set the hour of the day, so you can take nighttime shots with ease, or switch back to daytime if it gets dark in the middle of your shoot. You will need Open for Business or later expansions to use this cheat.
There is a full listing of all of the cheats with their expansion pack requirements and descriptions of their use available in the Game Help section at MTS2. There may be more cheats that you will find useful there as well.
If you would like to shorten some of the longer cheats for easier use (so you can just type "moo" instead of "moveObjects on" for instance), or put on certain cheats automatically, you can do so by setting yourself up a userstartup.cheat file. There is a tutorial on how to do that on MTS2 in the Game Help section.
Basic Set
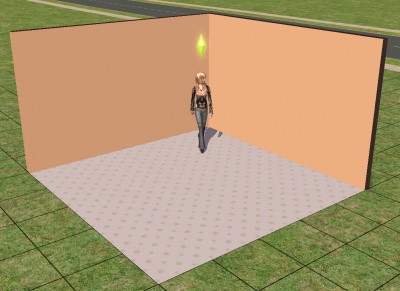
The most basic type of set is just two walls with flooring stretched between them. This will give you nice, brightly-lit pictures, and is perfect for getting a picture of a sim taken against a solid-colour background, often a requirement for contests. If you need some simple, basic walls in a variety of colours, try this set by FionaAzrael at MTS2.
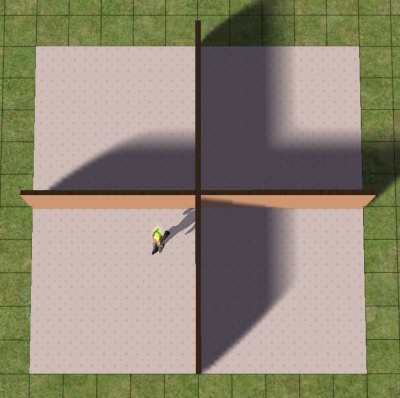
Try placing walls and floors as shown, in a cross shape. Take a look at each corner in the game and notice the lighting. See how only one of those four corners is well-lit on both walls and the floor, the bottom left corner? You would want to place your sim in this corner for picture taking, as it will give you nice, clear, brightly-lit pictures. Placing your sim in any of the other corners, with shadows in them, would give you darker pics that won't look as nice.
You don't need to build this whole cross shape each time, just place some walls horizontally and vertically to see which direction the light is coming from, then build the one lit corner - two walls in an L shape, with flooring stretched between them.
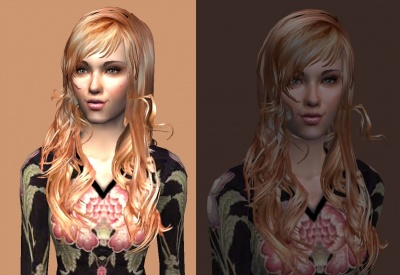
Full daylight will give about the brightest, clearest light you can get in the game, but it can wash out some details, especially if what you are photographing is mostly very light colours.
Notice how certain areas in the brightly-lit pic that are highlighted lose detail - the white parts on her cheeks, nose, forehead, and chest, and a little bit on the design on the front of her shirt and in the highlights of her hair, there is a loss of detail due to brightness. You don't get that same loss of detail in the darker pic, and there is more depth to the colours, but there are also no bright highlights at all, and the low-contrast makes things look muddy.
Indoor Set
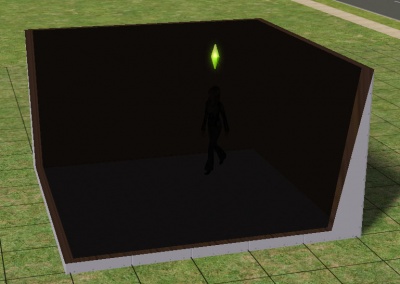
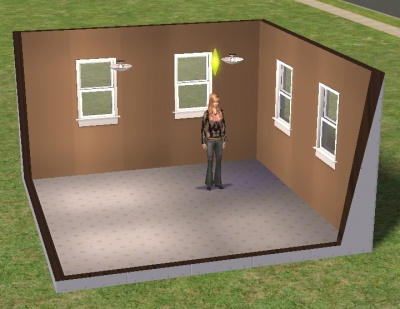
Exterior lighting will give you bright lighting, but if you would like more depth to your pictures without bright, harsh daylight, you can add a few walls to the simple set, and create an interior set. It may be tempting to use an existing house for pictures, but generally building a small set just for pics is better, as you will be able to take pictures much quicker on a smaller lot with only your needed walls and objects.
Notice how even though it is an interior pic, because much of the lighting is from the windows, the room is better lit on the near corner, and darker in the far corner. You would want to make sure you have your sim facing toward the direction of the light, so they are better lit for pictures.
Notice how the dark parts of her shirt still have a little shading to them, but the light parts of her cheeks, nose, forehead, and upper chest don't lose detail. There is much more depth to the lighting in a well-lit interior shot. You can still overdo it with lighting if you use certain lights directly above a sim, too many lights, lights which are too bright, or your sim has very light skin, eyes, or hair. Pay attention to the highlighted areas and make sure they still have depth, and watch the darker areas to make sure they are not too light or too dark as well.
Advanced Sets
Garden Set
Beach Set
For swimsuit parts of competitions, or just for some cool tropical pics, sims look great in a nicely set beach scene.
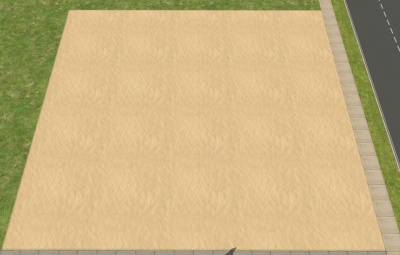
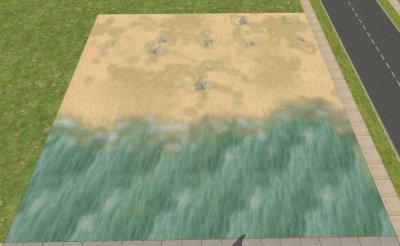
For this lot, a sim should face the sidewalk (the front of the lot) for the best lighting. We're going to take a picture with the sim on the sand, looking out over the water which will be in the foreground of the picture, so we'll put sand at the far end, and water at the near end. If you wanted water behind your sim, or beside, or some sort of different orientation, you would need to paint your lot accordingly, so you could get that shot with your sim still facing the correct direction for proper lighting.
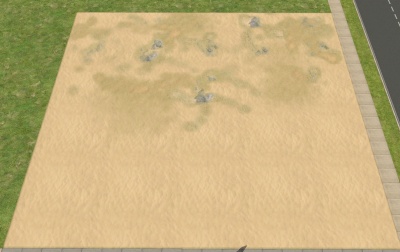
Now, on the far end of the lot, add some spots of different terrain paint using the smallest brush. If you find certain areas look too regular or you think you've textured too much, try going over that area with a single click of your original texture using a the medium-sized terrain brush.
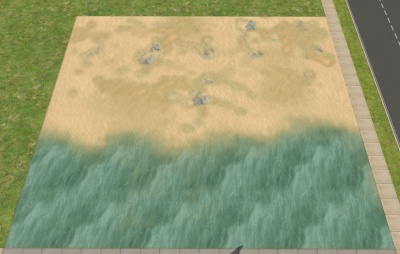
Add a few spots of a different water texture up toward the shore line. If you have any snow terrain paints, you can add a single click or two to make white-capped waves, and quick swipes of the mouse left to right will give spotty little bits of white that can create a convincingly foamy-looking shore.
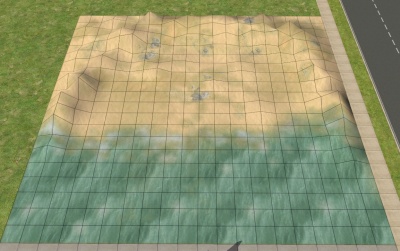
Switch to the terrain tool. Use the Raise Terrain tool on the smallest brush size and draw a rough arc around the back edge of your lot, from the shoreline from one edge, back toward the back of the lot, then down the other side. Let go of the mouse button with each pass. Do this several times, till you build up a little arched area basically like the picture shown. You don't have to be exact... you want it fairly rough.
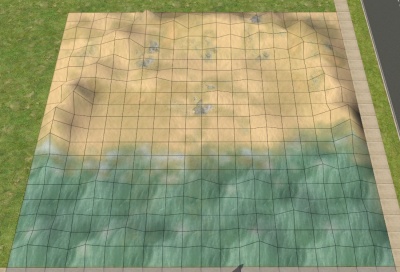
When you have the whole area fairly raised, then sculpt it with a little more care - areas that are lighter should tend to be a bit higher than areas that are darker. The rocks on my beach are also part of the terrain, so I've raised them up a little bit too.
This terrain sculpting will basically give you a lumpy little bowl shape in the middle of your lot.
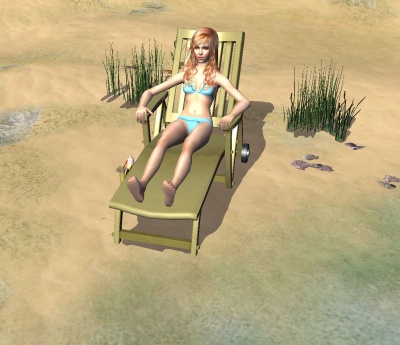
I've put my sim in a lounge chair, which is rotated 45 degrees. Sims won't get into a chair that's rotated (they'll just complain) but you can put the chair straight, direct the sim to sit, and then pick up and rotate the chair. You'll need both the 45degreeangle cheat and moveobjects on to do so.
Home Set
Loft or Industrial Set
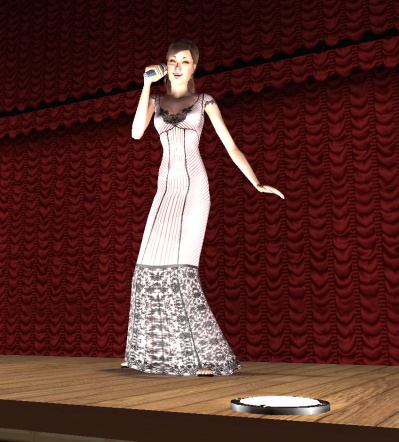
Stage Set
Want to make it look like you have a sim performing on stage? Here's how to build a nice set for a realistic look.
You will need Open for Business so you can use the stage tool.
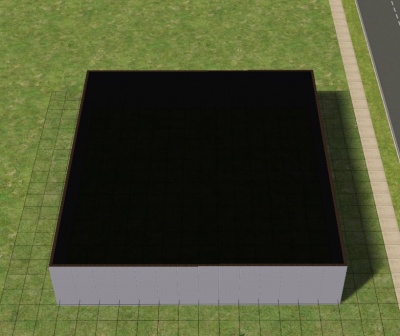
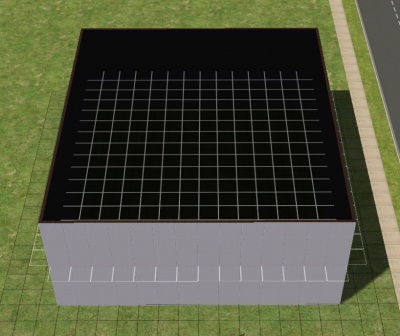
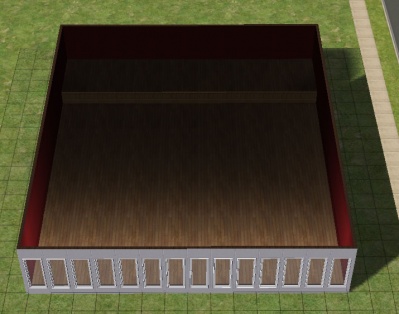
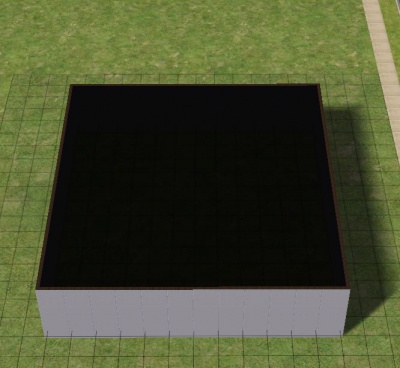
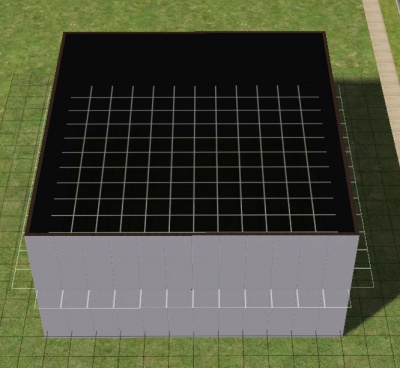
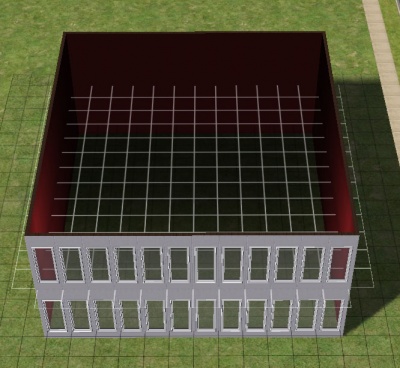
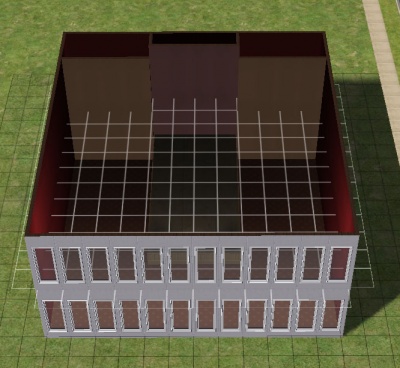
1. Start by making a big ol' box on your empty lot.2. Then trace over that box on the second floor. You now have a two-story box.
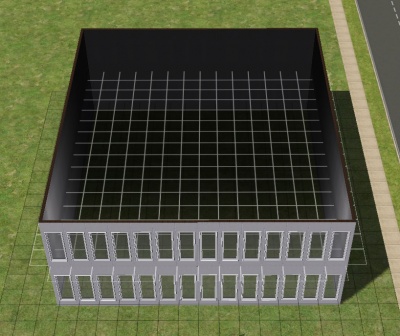
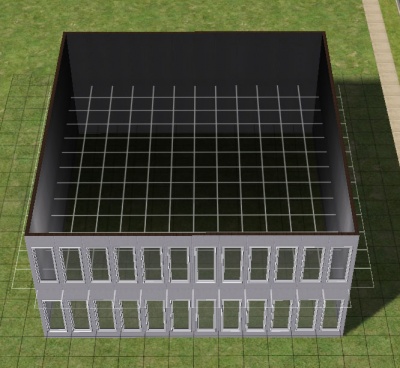
3. Line the front wall of the box with windows. Remember, there is a direction to the lighting coming into your lot, so the front is whichever way the light is coming from. Do the same on both levels.
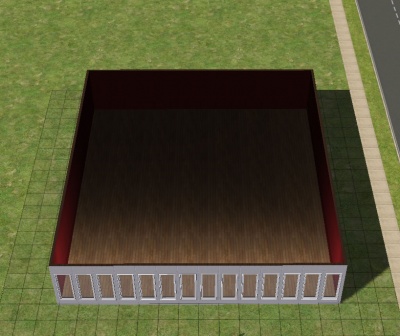
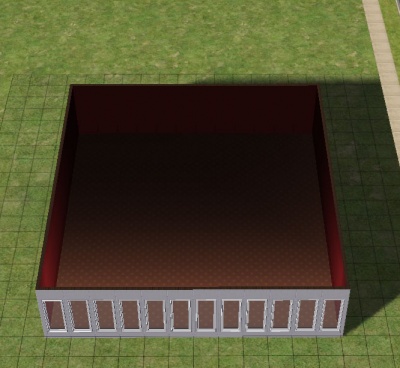
4. Now cover the walls on both levels with a basic wall texture. I'm using blood red paint. You use whatever is appropriate to your setting.
5. And cover the floor with a basic texture. I'm just using a basic Maxis wood.
6. Use the Stage Tool to draw a stage along the back wall a few tiles deep. The depth of your stage will depend on what kind of venue you're trying to emulate... We're going for more of a small venue club or playhouse stage here, so my stage is only three tiles deep. This will give a closer, intimate feel to pics taken on this stage.
If you're going for a larger venue, like an operahouse or concert stage, you may want to do more like 5 tiles deep. Try to resist the urge to make a HUGE stage - it will be hard to get a good background going, and any details you add to the background will likely be lost.
Now cover the stage with a floor texture. I'm just using the same wood I used for the sub-floor. You can also cover the front wall of the stage with a texture now if you like, but I think I'm going to leave it as-is.
8. Now finish the edge of the stage using a fence. I'm using the Edge Smoothers from Ailias at MTS2.
Make sure to switch to live mode to turn them on once placed.
12. And that's about all you need. We'll go into exactly how to pose your sim for stage performances later.
Runway or Catwalk Set
Yes, yes, we all make VERY pretty pixel dolls, don't we? Well, if you've got some skinny little model in a ridiculous outfit and funky makeup that just HAS to strut down a runway, here's how to make a pretty one.
You'll need Open for Business for the stage tool. Ain't gonna work right without it. Sorry.
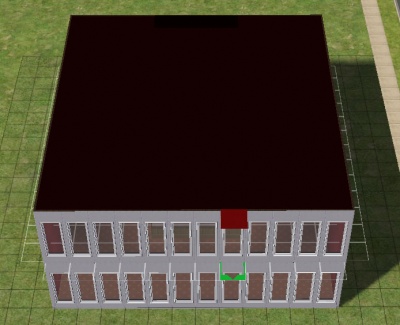
1. Start by making a big ol' box on your empty lot.2. Then trace over that box on the second floor. You now have a two-story box.
3. Line the front wall of the box with windows. Remember, there is a direction to the lighting coming into your lot, so the front is whichever way the light is coming from. Do the same on both levels.
4. Add a nice basic wall texture to both levels. I like blood red paint. You use whatever you like. This probably won't show much.
5. Cover the floor of the bottom level with a nice floor.
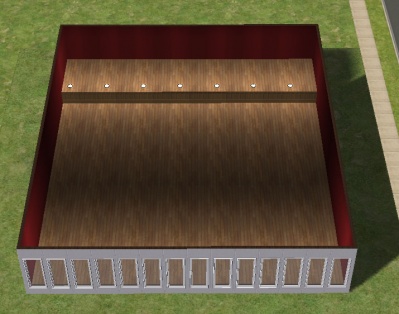
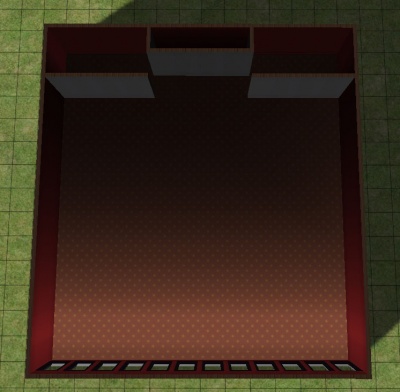
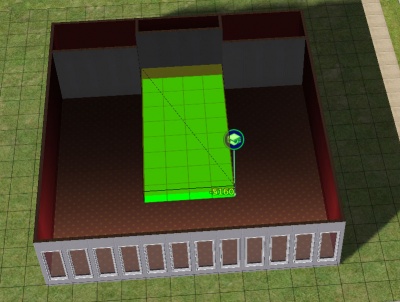
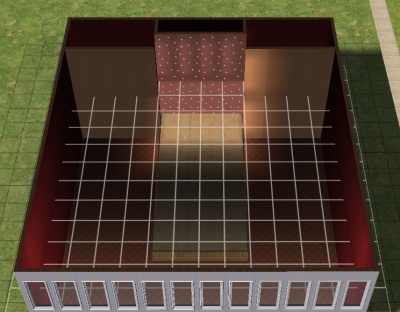
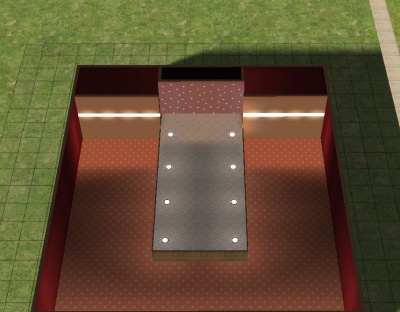
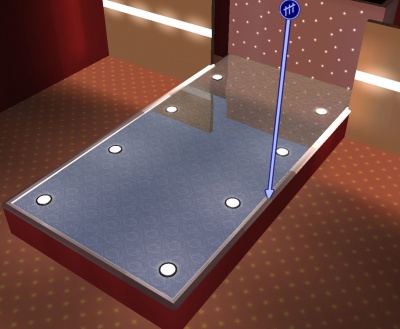
6. Let's add a little detail to the back wall. Catwalks always have interesting little entrances for the model. Add a one-tile box along the middle of the back wall, and little wall pieces extending in, leaving a two-tile space from the back wall up to the edge of the box as shown. Make sure you trace over these pieces on the top level too, so they extend up to the second level.
7. Now use the Open for Business stage tool to make the actual runway itself. Start in the little corner made by your wall pieces in the back, and out into the room. Leave some space in the front.
8. And put some pretty wall textures on those extra bits of walls you added. Again, both floors.
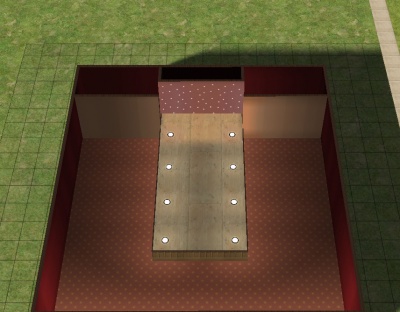
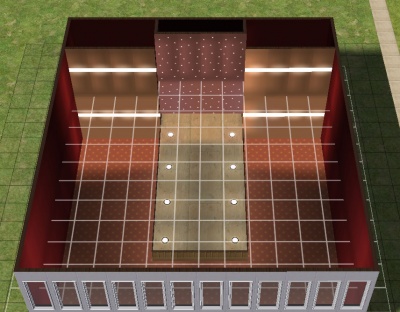
9. Now it's time to light the space. Start by adding lights on the middle box part. I'm using the Starlamps by Xanathon at MTS2. Turn on the lights when you have added them to both the top and bottom floors.
In order for objects on both the top and bottom floor to show at the same time, you'll need to make sure that Object Hiding is turned Off in your game's graphics options.
11. Along the other walls, add some other lighting. Again, I'm using lighting from Xanathon at MTS2, this time the wall-mounted light panel. Remember to add a set to the second level, and to turn them on, too.
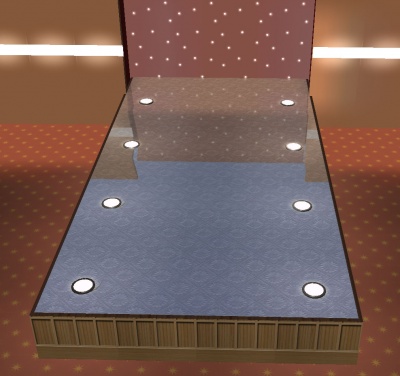
12. And add a nice floor texture to the runway itself.
13. This part isn't required, but can look really cool... there are some really neat objects available from Murano Mobilia - flat pieces that lay over any floor tile and make them reflective and shiny. I've gone ahead and added these to my floor.
You will need to make sure Reflections are turned on in your game's graphics options for them to be shiny - otherwise they'll just look opaque black.
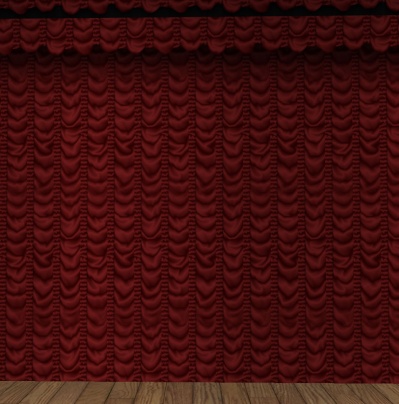
For that I'll be using the Visible Ceilings by jgwhiteus at MTS2, with my blood red recolour, also available at MTS2.
Cover the entire second floor with ceiling tiles. It'll basically look like a flat roof. You will have to do it one by one. It can take a while.
Normally with those ceiling tiles you'd need to flip them down so you could continue working on things on the second floor, but we're about done with things there, and you'd have to save, exit the lot, go back to the neighborhood, and back into the lot for them to show up with the proper recolour after being flipped down. Luckily, we don't need to do that.
You may notice the sky is back in my pic - that's because I'm on the lower level, so the top floor (and the ceiling on that level) isn't visible. It won't be that way for pics.
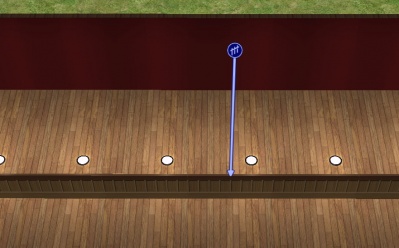
For that, I'm using these awesome little Edge Smoothers fence by Ailias at MTS2 to give my stage a nice clean, finished look. I've left the last little tile at the back of the stage without a smoother, as our models might trip over that little edge when going backstage.
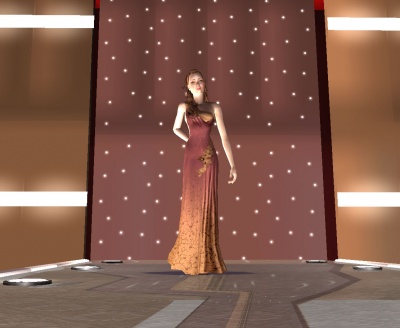
Use moveobjects on to place your model at the end of the catwalk, and click "walk here" toward the middle of the end of the catwalk to get them in a nice, natural in-motion pose.
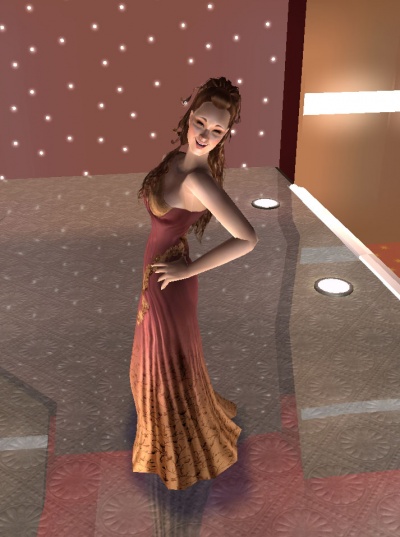
When you use TAB to go into Cameraman Mode, you will still see the sky reflecting in the floor, and the second level will not be visible. Use the Page Up key on your keyboard to raise the walls of the next floor, and with it, the ceiling. When you are in Cameraman Mode, your camera will stay at the same place when you hit this key - it will just pop up the next floor's walls.
My walls are a little bit patchy with lighting up on the second floor in this pic - this is due to not even having a real graphics card. If I were using this pic for a story, clothing release, or contest, I would want to open up Photoshop and do some work equalizing that strange lighting. More on that type of edit in later sections of this tutorial.
Notice how nice the red ceiling looks with the reflective floor - picture the same pic with a blue sky showing. Much better than that, eh?
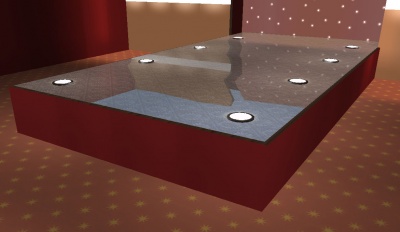
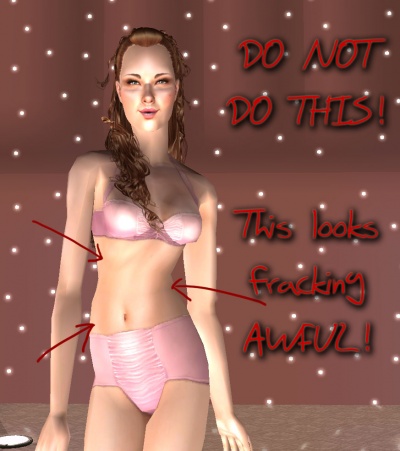
Note the pose in the picture to the right.
The human body does not move like that. The skew of the belly vs. body, especially in meshes that have a slimmer waist to hip ratio, looks alien and will totally ruin any attempt at sexyness, feminine beauty, or aesthetics you're going for.
Do not take pictures of that part of the model walk unless you're just shooting the upper torso, breasts and up.
PLEASE.
I beg you.
Thanks.
Posing Sims
Stage Performance or Singing
Having it look like your sim is a real rock star or singer can be difficult, especially since Maxis for some reason put in bands in University, but forgot to give them a singer! However, if you're clever with these tricks, you can create a very convincing look in pics that makes it seem like your sim is singing along with a band.
1. First, you will need Nightlife to have the karaoke machine. Purchase it and place it on your lot. Then direct your singer to Sing Solo. You'll need to unpause to allow them to begin the interaction.2. Then, move your sim up to the stage, and move the karaoke machine somewhere out of the way. The little blue circles of the sound coming out of the speakers will stay where the karaoke machine was for a moment, but don't worry about them, they'll go away once you unpause.
Now you can take pics of your sim just like that if you want - they'll continue to do the karaoke machine animations (including ones that will look a little strange without it in place, like jumping off one of the pieces of the machine). If your sim does not have maxed creativity, you'll get the blue skill bar above their head, which doesn't come off with the cheats to remove other above-the-head graphics. For that, I tend to use the InSIMenator as it has a skills adjustor that you can use to instantly max out your sim's creativity skill.
You can always turn on the snapobjects/allow45degreeangle cheats so you can place your sim exactly how you want them, too.
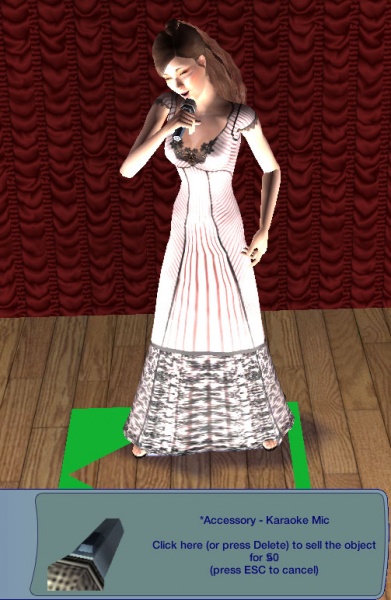
Start by zooming in pretty close to your sim, and with moveobjects on, click on the mic. You may catch your sim instead of the mic the first couple tries, so that's why you zoom in very close. When you've got ahold of the mic, you'll see a pic like the one at right.
Press the Delete key on your keyboard to delete the mic. Now your sim will sing with the karaoke animations, but without the mic.
First, move your sim out of the way, and then place the microphone you want to use - otherwise if you try to place the mic close to the sim rather than the other way around, the microphone will try to snap into the hand slot you just removed the karaoke mic for, which is not what we want.
That's just my sim from the previous pic, in the same pose, moved close to the mic. Not half bad, but her hand isn't in the right position.
You may have to pick them up and move them to get their positioning exactly right. For example, just unpaused from the previous pic, here's my sim in a lovely pose to grasp the support for the microphone:
Here are some good things to remember while grabbing that perfect pose:
- You can rotate your sim using the allow45degree cheat using the , and . keys on your keyboard. People move around the mic as they perform - the mic itself generally stays in about the same place and the performer moves. Rotate your sim to get the best lighting, then play with your camera angle.
- You can use the middle mouse button to change your camera angle and swing your view around, even if you've picked your sim up and you're holding onto them at the time. This makes it very helpful to make sure your sim's face and hand aren't clipping into the microphone from a slightly different angle.
- Your sim doesn't have to be tightly grasping the mic, just gently around it. You can also use poses that make it look like the sim is holding onto the top of the mic, especially if you're using a more modern style one.
8. Below are just some fairly quickly-snapped pics, rotating the sim around the mic and repositioning her as she got into a usable pose, showing the use of this technique. Of course, you can do these very same poses with a handheld mic just leaving the karaoke mic in place, or a more modern microphophone (as linked above), but aren't they pretty?
Other options:
This is just my favourite method for getting singing pics, as the sim looks great doing it and I've done it successfully before. However, there are some other options that don't require Nightlife that you may want to look into:
- Use Cokenasmile's Retro Microphone which is functional - in that you can do practice speech and practice romance animations with it. You can also just use that item as a decorative piece, as I did above with the karaoke machine, but the practice speech and romance animations are animated speaking poses, and if you are clever with angles and pausing on just the right spot, you can get some great shots using it.
- Use decorgal21572's Standing Talk/Conversation Hack to pose your sim, as shown above, with a decorative microphone, and then have them do one of the talk animations. Open-mouthed, animated talking looks a lot like singing.
- Use the Entertain - Freestyle animation from University to get your sim to rap. The animation styles aren't generally appropriate to a torch singer like I have shown above, but they can be good for rock stars and rappers.
